

This is a guide specifically for Auxiliares de Conversación (However, a lot of the information is relevant for other student visa holders)
NIE – Identification number
(Número de Identidad de Extranjero)
It will start with X, Y, or Z followed by 7 numbers and ending with a control digit.
TIE – Your physical card that has your identification number on it
(Tarjeta de Identidad de Extranjero)
Upon entry to Spain and within the first thirty days, applicants must apply* for a Foreigner Identity Card or TIE where the applicant is located. The TIE will be valid for as long as the auxiliary is enrolled in the program in Spain.
*You only need to start the TIE process within the first 30 days. Do not worry about receiving the TIE within 30 days of arriving. Getting your TIE can take 2-3 months.
Don’t worry if you have difficulties finding an appointment within the first 30 days of arriving to Spain either. Your visa will remain valid until its expiration date (this DOES NOT mean you can go without a TIE entirely. It is a legal requirement for long-term visas.) If you have difficulties finding an appointment, just keep trying. How to make an appointment is covered below.
Quick Announcement:
Running this website takes time (and money), but you can support it at no cost to yourself.
When moving to Spain, you’ll need services like a bank account, money transfers, and a phone plan. I’m an affiliate for companies I personally recommend, and my referral links often include discounts for you.
Use them when setting up your life in Spain. You save money, the site earns a small commission, and everyone benefits.

Now, back to the guide.
Required Documents
- Carta de Nombramiento (enrollment certificate if you are not an auxiliar de conversacion)
- Foto de Carnet
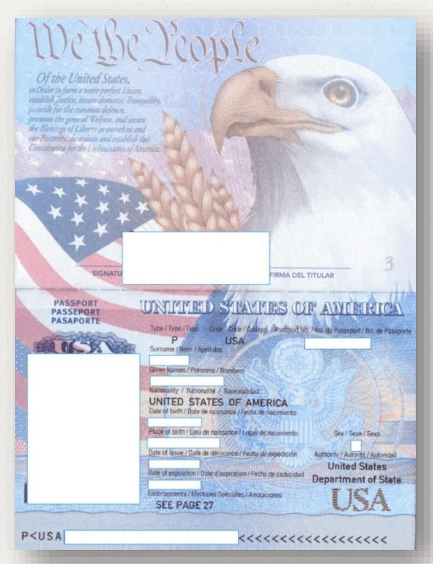
- Passport + Copy of all Pages (including stamped page indicating your arrival to Spain)
- Empadronamiento + Copy
- Completed EX-17 Form + Copy
- Tasa 790-012
TIE Process
- Get an Appointment
- Toma de Huellas (Fingerprinting appointment)
- Recogida de Tarjeta (Pick up your card)
Required Documents
Carta de Nombramiento
Print two copies of your Carta de Nombramiento. Your Carta de Nombramiento fulfills your proof of financial means, insurance, and acceptance into a program.
If you are not in the auxiliar program/have a Carta de Nombramiento, you would have to provide an original and copy of your enrollment certificate.
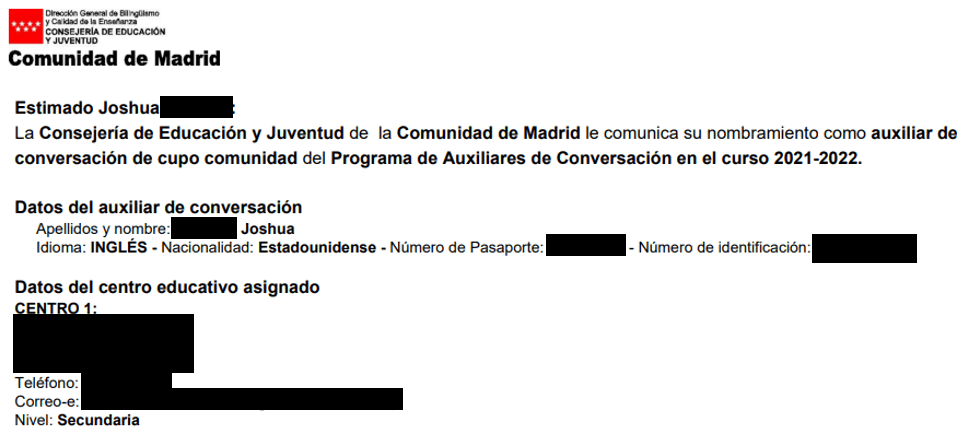
Foto de Carnet
The Foto de Carnet is a professional 32x26mm photo similar to a passport photo (2″x2″). You only need one picture for your TIE, but I recommend making extras just in case. You can easily get this done at any number of Photo Kiosks. These are found all throughout Spain in subway stations, bus stations, supermarkets, by police stations, and anywhere with decent foot traffic. It’s cheap and easy. Have the pictures taken. Carefully cut out the individual pictures, and bring an envelope with your picture(s) to your future TIE appointment.

Passport + Copy of all Pages
Bring your passport along with a copy of all of your passport pages (yes, all of them). They may only ask for your biodata page, visa page, and the stamped page (if you have it) from when you first entered Spain with your visa, but they may also ask for all pages.

If you are not offered a stamp when passing through customs, you can always try requesting it to avoid any potential headaches.
If you did not receive a stamp when entering Spain (Europe has switched to an electronic system) or if your stamp is not visible, bring your flight boarding pass to prove when you legally entered Spain.
It’s a good idea to bring your boarding pass indicating your arrival date just in case, but some bureaucrats can be difficult and will not accept a boarding pass (incredibly rare).
In this situation you can bring a declaración de entrada en territorio español.
“The declaration must be made in person at the time of entry at the police post at the border. In the event that there is no such police post, the entry declaration must be made at any police station and foreigners office within 72 hours from the moment of entry.”
Typically, you can find a suitable police station at the airport.
Declaración de Entrada en Territorio Español
Requirements:
- Original and copy of completed form (above)
- Passport and copy of passport ID page alongside copy of entry stamp from Schengen country (if you have it).
- Copy of plane ticket. If you didn’t arrive by plane, make sure you have something that proves you entered Spain within the last 72 hours.
To request a Declaración de Entrada en Territorio Español, bring all of your required documents and head directly to a police comisaría that deals with fronteras. This must be done within 72 hours of arriving in Spain.
There is no formal way of requesting an appointment for this process, so do not be discouraged from walking up and requesting this document when arriving.
Although rare, some bureaucrats will deny your application for a TIE if your passport was stamped before your visa’s stated entry date or if you don’t have sufficient proof of entry. You would be required to leave the Schengen area and re-enter.
Empadronamiento
During your TIE appointment the bureaucrat might not even request an empadronamiento (anecdotally, it’s about a 50/50 chance depending on your region and luck). Make sure to bring it just in case.
Whenever I’ve been asked for my Empadronamiento, I have given the Volante de Empadronamiento every time, and I have never had any issues. You can find out about the Empadronamiento process in the link below.
The Volante de Empadronamiento is the receipt given to you when first applying for Empadronamiento. It will either be a stamped copy of your solicitud or a separate piece of paper printed with your Empadronamiento information. The official certificate takes about a month to process. If you want to be cautious, you can wait until you have the Certificado de Empadronamiento before attending your TIE appointment.
People have been rejected for just submitting their volante, so play it safe if you can.

Completed EX-17 Form
Complete the form and sign it. Bring the original + a copy of your completed and signed form. The guide is included below.
EX-17 Form – If the link doesn’t work, you can always find the form during the appointment process.
Section 1: (if you were not assigned a NIE number with your visa, you can leave it blank and just fill in the passport section)

Sexo H – Hombre and M – Mujer.
Estado civil is S for soltero, C for casado, V for viudo, D for divorciado, and Sp for separado.
Address needs to include all of the necessary information (escalera/bloque/whatever).
Section 2:
Leave Blank
Section 3:

I recommend you do not check the box under section 3. This will consent to all vital communications and notifications being sent online instead of by mail. If you do not have a digital certificate or cl@ve, you won’t be able to access these notifications.
Section 4:


(city/town a date de month de year)
Tasa 790-012
The Tasa Modelo is a tax form you have to fill out and pay at a bank branch or ATM. This form is used to pay for your TIE appointment. I highly recommend going inside a bank branch to pay the tax form with exact cash (usually you don’t need exact cash, but some bank branches can be particular). This way you are guaranteed to get a stamped sheet back proving your payment for the TIE appointment.
It’s also a good idea to get there before 11:00 a.m. as many banks stop offering this service at that time.
If you have a local Spanish bank account, use your bank branch. If you do not have a local Spanish bank account, you can still use a physical bank branch without issue (go before 11 am). I’ve had great luck with Caja Rural in the past. Just go up with your Tasa Modelo filled out, your ID (Passport), and your payment. To fill out the form, use the following link.


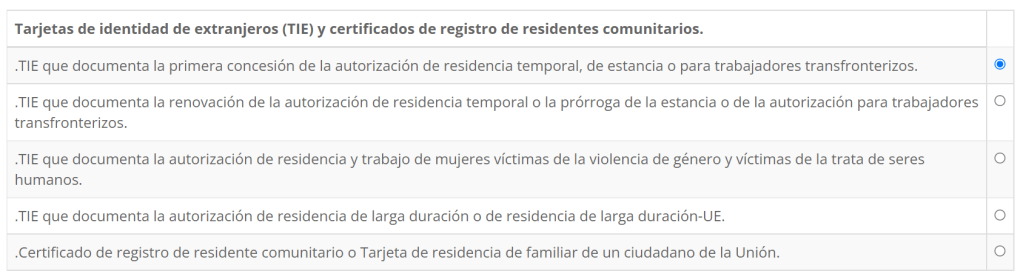

After filling out the form, download the form and print it out. Make sure to sign it! Bring the form with exact cash to a bank branch and pay the fee there. Make sure you receive a stamped form in return. This is your proof that you paid the Tasa. Bring it to your TIE appointment.
TIE Process
Get an Appointment
Getting an appointment is the most difficult part of this process. There are often no openings available, so DON’T BE PICKY! Make sure to constantly check for openings because the Oficina Extranjería periodically adds more availabilities.
When I first did this process, it took me 2 months of constantly looking to find an available appointment. This was during 2020, so there was a huge backlog from the quarantine and shutdown, but it still remains difficult to find an appointment for many people. To make an appointment and check if there are availabilities, first access the Cita Previa link below.
Step 1:
Choose the province THAT YOU LIVE IN.
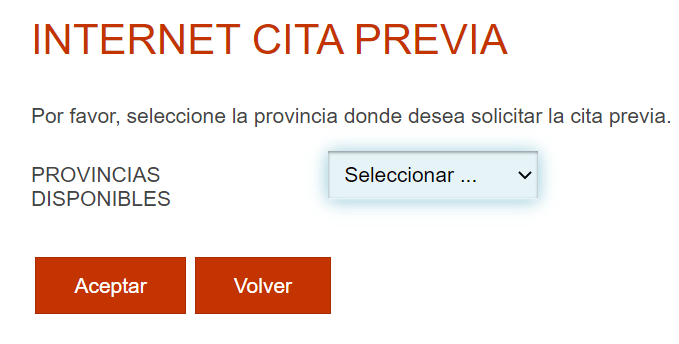
Step 2:
Provincia – The same as your previously selected choice.
Oficina – Cualquier oficina
TRÁMITES POLICÍA NACIONAL – Select this tab.
Do NOT select “TRÁMITES OFICINAS DE EXTRANJERÍA”.
“POLICIA TOMA DE HUELLA (EXPEDICIÓN DE TARJETA), INICIAL, RENOVACIÓN, DUPLICADO…“
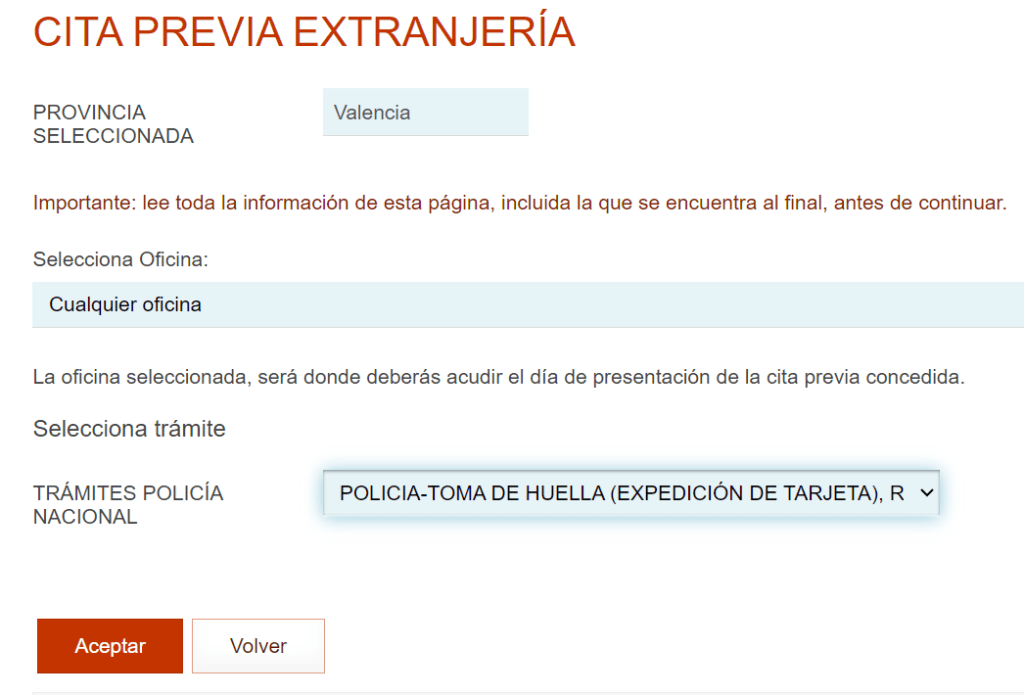
Step 3 and beyond: The following page has information about requirements for your TIE appointment. It also has information about renewals as well. Not all of the information is applicable for first time applicants!
After scrolling down and clicking “Presentacion sin Cl@ve” and moving on to the next page, you will need to enter your information.
Individuals living in Almeria and Castellon get a unique Catch-22 situation. They only allow presentacion with Cl@ve/digital certificate. Unfortunately, getting a Cl@ve or digital certificate requires… a TIE!
Your best bet as of now is to go through the initial steps of applying for a digital certificate, and when presenting your documents, explain the situation and hope they accept your visa with your NIE in lieu of the TIE.
How to apply for a Digital Certificate
If that doesn’t work, you can also request help from your coordinator and/or hopefully use someone else’s digital certificate to go through the process.
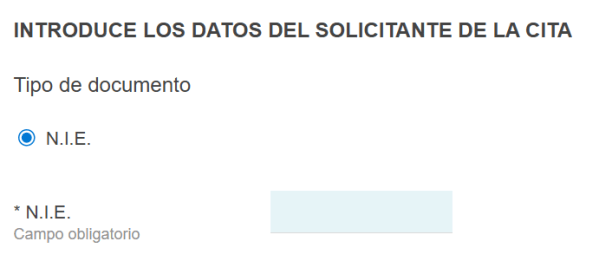
Unfortunately, since 2023 regions are now only accepting the NIE number. This creates another Catch-22 for those of you who did not receive your NIE number with your visa. Your NIE is created when your visa gets processed, but not all consulates provide that information to you.
For many regions, they offer an email address found in the information page (the previous page, just hit “volver”). With this email address you can request your NIE information. It’s on a database. They just need to look it up and send you the information. Here is an example from Valencia:

If no specific email address is provided, you can also try sending an email to your region’s police office or ask at the extranjeria. It might be incredibly frustrating because not all regions are responsive or helpful.
Add your personal information further down in the page.
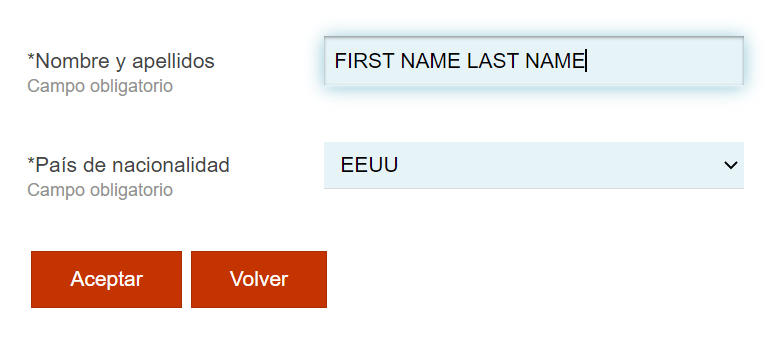
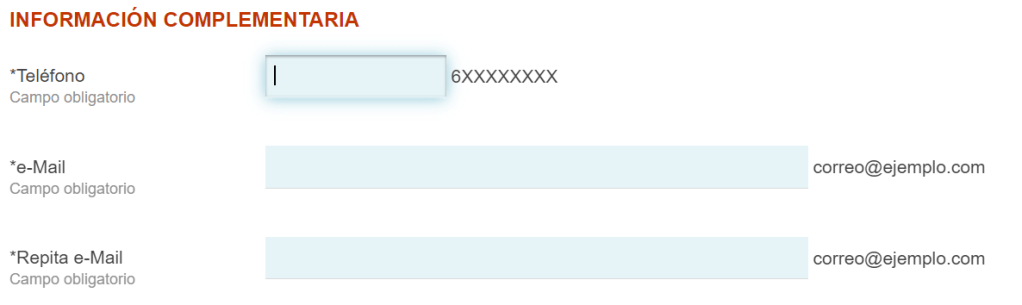
Hit accept and continue through the online forms. Add your contact information and continue.
In the next page, you can choose your appointment date and time.
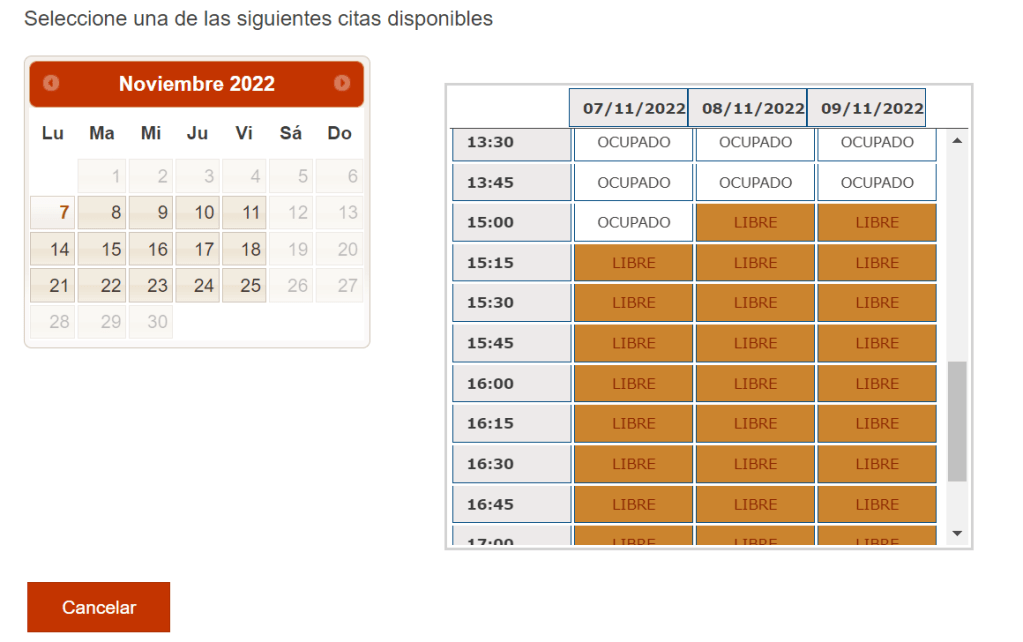
Once you choose an appointment, PRINT OUT the confirmation page and bring it to your TIE appointment.
Toma de Huellas
Bring all of your required documents and your appointment confirmation to your appointment. I always bring a pen with me to bureaucratic appointments in case I forgot to sign something. I also recommend carrying an organized folder with paperclips. Don’t be an unorganized mess!
- Carta de Nombramiento + extra copy (or enrollment certificate for non-auxes)
- Foto de Carnet + extras (just to be safe)
- Passport + Copy of all Pages (including stamped page indicating your arrival to Spain). If you do not have a visible stamp on your passport from your arrival, bring proof of your arrival (airline boarding pass, train ticket/information)
- Empadronamiento + copy
- Completed and signed EX-17 Form + copy
- Tasa 790-012 dutifully paid
- Appointment confirmation
Bring your phone in case you need google translate. Go to the correct office chosen in your appointment. Wait in line for “Toma de Huellas”. Hand over all the required documents when it’s your turn. Afterwards, they will take your fingerprints. Some great phrases to know:
- Tengo una cita para _______ a las _______
(I have an appointment for _____ at ______) - Dedo indice (index finger)
- Girar (turn)
- Poner (put)
- Izquierda (left)
- Derecho (right)
Even if you don’t know these expressions, the police officer will usually indicate which finger you need to place and how. After taking your fingerprints, you will be told to return to pick up your card in about 40 days (listen carefully to when you can return). They will also give you a document (a Resguardo) that you need to bring to your next appointment to pick up your card. Don’t lose it!
Recogida de Tarjeta
Make an appointment for about 40 days (or however long the officer told you) after your initial TIE appointment. Make sure it is at the same office as before!
If you want to know if your specific TIE card has been processed, you can check which “lote” or “batch” the extranjeria is on and compare it to the document you received in your Toma de Huellas appointment.
The appointment process for this step was introduced during COVID. Recently, I have seen some smaller immigration offices drop the appointment requirement, but for most of you, you will still need an appointment.
https://icp.administracionelectronica.gob.es/icpco/index

The appointment process is nearly identical to how you made the Toma de Huellas appointment, so follow the same steps and finish making your appointment. Of course, this time you will be requesting “Recogida de TIE” instead of “Toma de Huellas”.
Bring the following documents to your appointment: your passport, the document given to you in the Toma de Huellas TIE appointment, and your appointment confirmation.
Wait in the Recogida de TIE line. Offer your papers when it’s your turn. Scan your fingerprints, and accept your first TIE!
Congratulations!
If you found the website useful, please Support the Page. Every little bit helps.
Back to Navigation
The information on http://www.residency2spain.com is provided in good faith and is intended for general informational purposes only. Residency2spain makes no guarantees regarding the accuracy, reliability, or completeness of the content. Any decisions you make based on the information found on this site are made at your own discretion and risk. Residency2spain is not liable for any loss or damage resulting from the use of this website.
Copyright © 2022 Residency2Spain All rights reserved.

