

This is NOT for participants of NALCAP or other auxiliar teaching program. This is for American students enrolled in a Spanish university or a Spanish student program.
Additional info on Spanish bureaucracy and moving to Spain
Table of Contents
- General Overview of the Visa Process
- Timing (documentation and appointment)
- Required Documents (and how to get them)
- Getting an Appointment
General Overview
There are 3 Spanish consulates in Canada that serve various regions. Each consulate has some autonomy, which means they are allowed to adjust the requirements as they see fit.
What changes: Payment methods, application methods, what type of copies are required, leniency, and visa collection process.
What doesn’t change: Required documents (generally), the visa application fee, and the long wait.
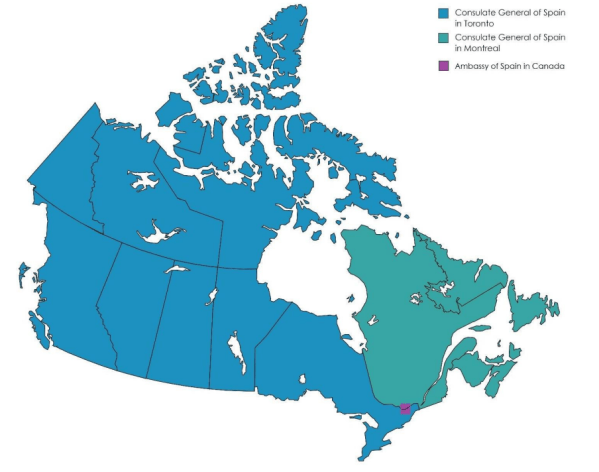
Before collecting all your documents and preparing for your visa application, it is important to know which consulate you need to prepare for. You must go to your regional consulate.
Additionally, you must also have proof of living in the consular district. If you have a state ID in one location but a driver’s license in another, you can choose whichever is most convenient (but bring the correct ID with you to your appointment).*
*Boston does not accept state ID or a driver’s license as proof. (More later)
Out of the 9 Spanish consulates in the U.S, 8 of them have outsourced their visa applications through BLS International. Instead of going directly to the Spanish consulate, you will apply through the BLS office located in the same city.
Puerto Rico is the only exception.
How does BLS affect the process?
Although BLS doesn’t process your visa, you will send your application through them. They have the authority to reject or accept your application before sending it to Madrid to be officially processed. In dire situations, you can typically sign a waiver requesting them to send your application to Madrid despite them rejecting you at your appointment.
They are able to arbitrarily set their own rules for visa applications.
They charge additional service fees for your visa application.
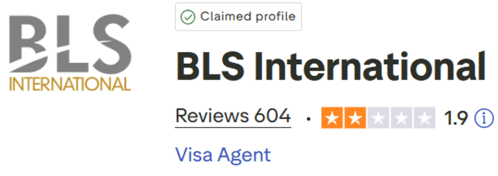
-BLS employees are poorly trained and are unfamiliar with different study abroad programs and visa applications. As a consequence, you may be arbitrarily rejected. Solution: politely escalate the issue to a manager.
-BLS employees are incentivized to add extra fees and upsell on additional services that are unnecessary. Solution: if it isn’t excessive, pay the fee and move on. However, please be prepared to say “no”. Also, be wary of potential scams from BLS.
-Not enough appointments are available for all the applicants. Solution: check for availabilities early and often. Estimate when you will have your documents ready and be prepared to reserve an appointment.
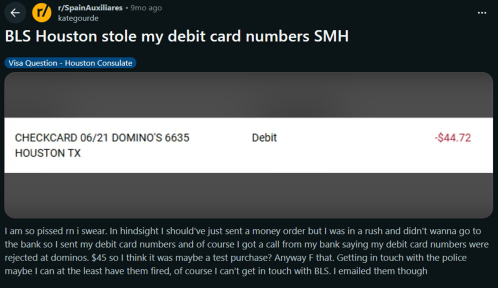
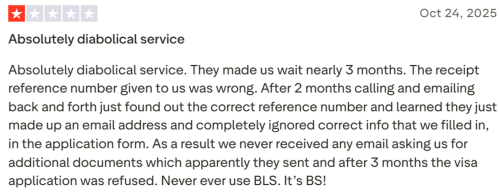
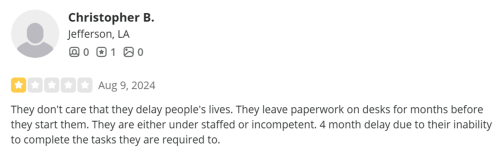
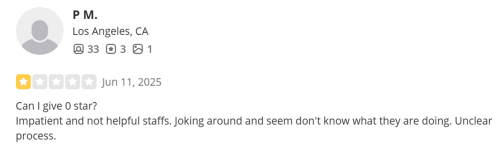
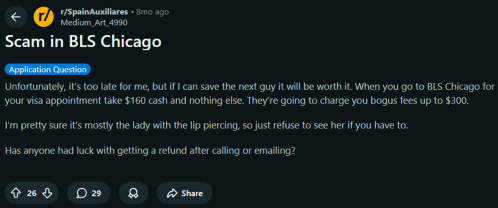
Even though BLS has its issues, if you are confident, prepared, and organized, you will be able to breeze through the visa application process.
Coming prepared:
Each consulate provides its own list of requirements for student visas. Additionally, BLS has its own list of requirements for a visa application. Take into account the information provided by both. I can guide you through the major requirements, but small changes can and do occur to the process. It is YOUR responsibility to be well-informed.
Consulate Links (USA)
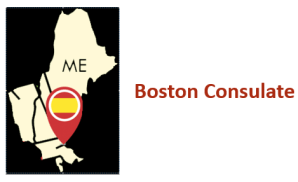
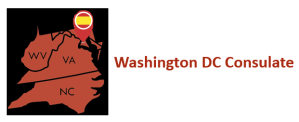
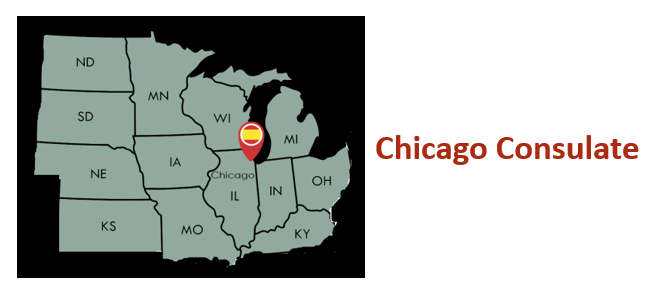


BLS Link
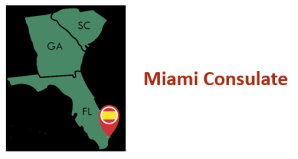
BLS Link
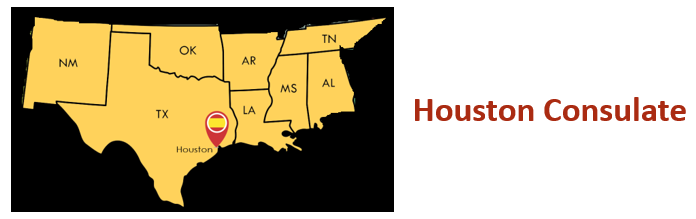
BLS Link
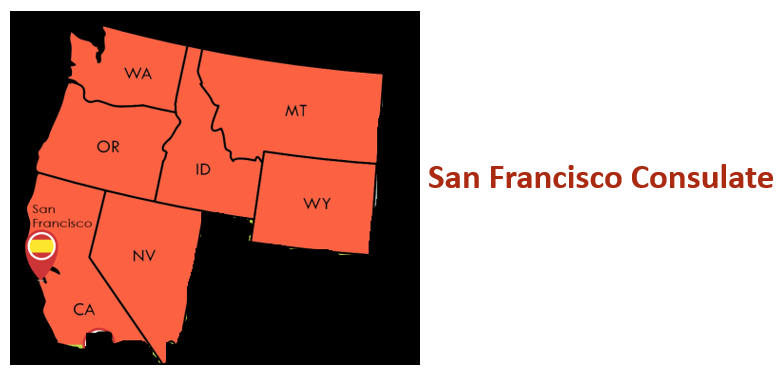
BLS Link

(Puerto Rico, Vieques, Culebra and the U.S. Virgin Islands)
Puerto Rico is much simpler than the other consulates. Book an appointment with the Spanish consulate directly through their contact info. Get a Puerto Rican background check and Apostille (much easier and quicker than the FBI background check)
Timing
When to start collecting documents, expiration dates, and when to book your appointment.
Before considering anything else. If you do not have a valid, unexpired passport, get one now. A U.S. passport is valid for 10 years. That means the earlier you get it, the better.
If your passport is set to expire within the next year and/or does not have enough blank pages for a visa, renew it.
“Passports issued more than 10 years ago are not accepted and they must be valid for a minimum of one year and also valid at least until 3 months after the end of the stay in Spain.” – Consulate of Spain in Boston
Expiration Dates

Certain documents “expire”. That means they lose their validity if they aren’t recent. The expiration date is relevant for the visa appointment, NOT the start of the program.
FBI Background Check – 6 months.
Medical Certificate – 3 months.
Other documents such as your passport style photos need to be recent, but no strict rules are in place.
Expiration dates have been changed in the past. They can be changed again in the future. Always double check with the consulate pages linked above.
Documentation Bottleneck

Most documents can be completed in one day (of course, don’t overwhelm yourself and try to get everything done on the same day). However, the Apostilled and translated FBI background check will be your bottleneck. It will also be the reason why timing matters.
-FBI background check. If fingerprints are done digitally and sent immediately: 1 week
–Apostille request. During the summer, there are often backlogs. At its worst, it can take about 3 months to receive your Apostille. (This can be expedited if needed)
-Sworn translation: 1 week
Excel Calculator:
Visa Documents Timeline (based on your program’s start date)

Prioritize getting a passport and the Apostilled FBI background check process started.
While those documents are being processed, look for available appointments (remember, at least 2 months before your program’s start date). Estimate when you will have all the necessary documentation ready and take anything that may fall into those dates.
There are often backlogs at consulates, so the earlier, the better.

The other documents can be completed as you go (they are much simpler).
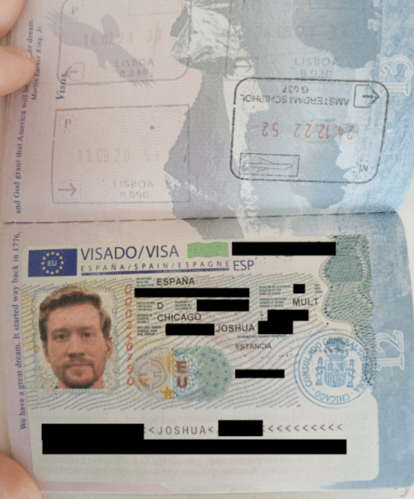
Do not buy your flight to Spain until you have your visa in hand. There can be delays and various setbacks. Refundable flights are okay.
Requirements
- Apostilled and Translated (by a sworn translator) FBI Background Check**
- Visa Application Form**
- Photographs
- Passport (+ photocopy of biodata pages)
- Acceptance into the program**
- Proof of Payment – Tuition for the program**
- Proof of Financial Means**
- Proof of Accommodation**
- Proof of Insurance**
- Medical Certificate**
- Proof of Residence in the Consular District (+ notarized copy)
- Disclaimer Form(s)**
- Payment of the Visa Fee
- Visa Application Appointment
**You need an additional photocopy.
Apostilled and Translated FBI Background Check
Official Requirement Language:
Criminal record certificate if the applicant is not a minor: Original and copy of the criminal record certificate issued by the country or countries of residence in the last 5 years (residence defined as having stayed in that country for 6+ months).
In the US the criminal record certificate must be issued by the US Department of Justice – Federal Bureau of Investigation (FBI). Certificates issued at the state level by the Department of Law Enforcement, nor those issued at the local level, are not accepted.
The certificate must have been issued in the 6 months prior to the visa application. It must be legalized with the Hague Apostille and translated into Spanish.
Any criminal record certificate that has been tampered with or damaged (including staple removal damage) will not be accepted under any pretext.
If you have lived outside the United States for the last five years, you must also submit a criminal record certificate (legalized with the Hague Apostille) and its translation into Spanish by a sworn translator (and a copy of both documents). If you have lived in countries that are not part of the 1961 Hague Convention, the certificate must be legalized by the Ministry of Foreign Affairs of that country and then by the Consulate of Spain in that country.
Getting a Spanish Background Check from Abroad
Step 1 – Fingerprints and FBI Background Check
Overview of the FBI Background Check Process
≈Day 0 Request an FBI background check by submitting an online application along with your fingerprints (digital or physical). Follow the steps provided by the FBI for an online background check request.

Applying online is the fastest and most effective way to receive your FBI background check. Read steps 1 through 7 and then enter your e-mail address in the box to the right. (this process can also be done while in Spain)
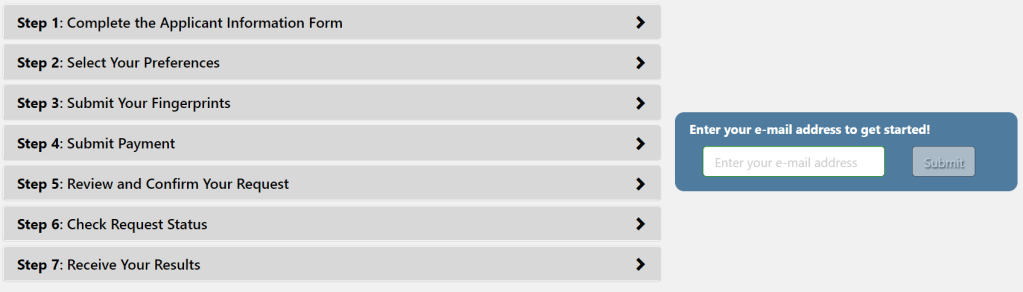
After you click submit, you should receive an automated email with a PIN and a link to your request.
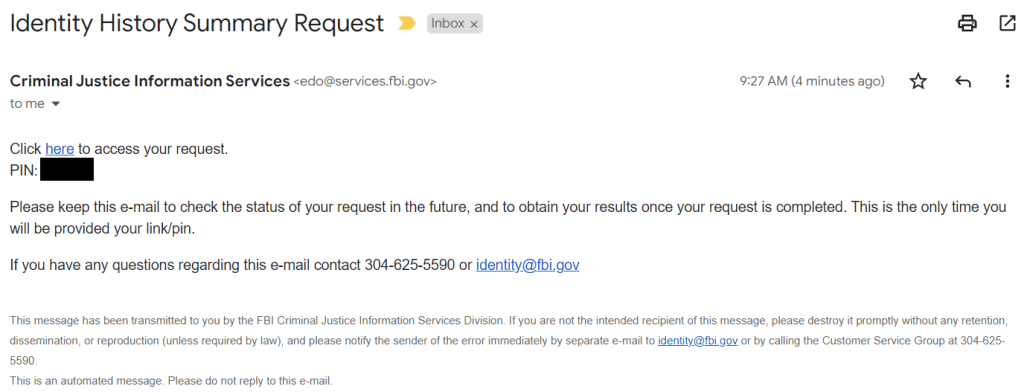
Click on the link and enter your PIN to continue. There you will have to agree to a privacy statement before you continue. The webpage has 5 steps to follow. I’ll walk you through them, but they are very simple. (The webpage may give you errors if you do this on mobile. When I accessed it using Google Chrome on my mobile device, it didn’t provide me all the options available.)
Step 1 – Personal Information: Enter your personal information.
Step 2 – Mailing Address: Enter your mailing address and phone number.
Step 3 – Preferences: Q1 – Yes, Q2 – Yes, Q3 – Yes, via e-mail (enter e-mail address)
Step 4 – Fingerprint Card:
Have this done electronically. It avoids the needless delay of sending an application by mail (sometimes the delays are up to 3 weeks).
Fingerprinting Locations for those of you Currently Residing in Spain (you can also always fill out a fingerprint card and mail it in)
If for whatever reason, you can not get this done electronically, click on the mail option and follow the steps there. You will need to fill out a fingerprint card and send it by mail. To get a fingerprint card properly filled out, print out the fingerprinting template and bring it to your local police station. There, you can pay a small fee and request to have fingerprinting done for an FBI background check.

After selecting Electronic submissions, a box will pop up giving Third-Party Fingerprinting Locations near you. There is also an option to expand your search radius if the options provided are not convenient for you.
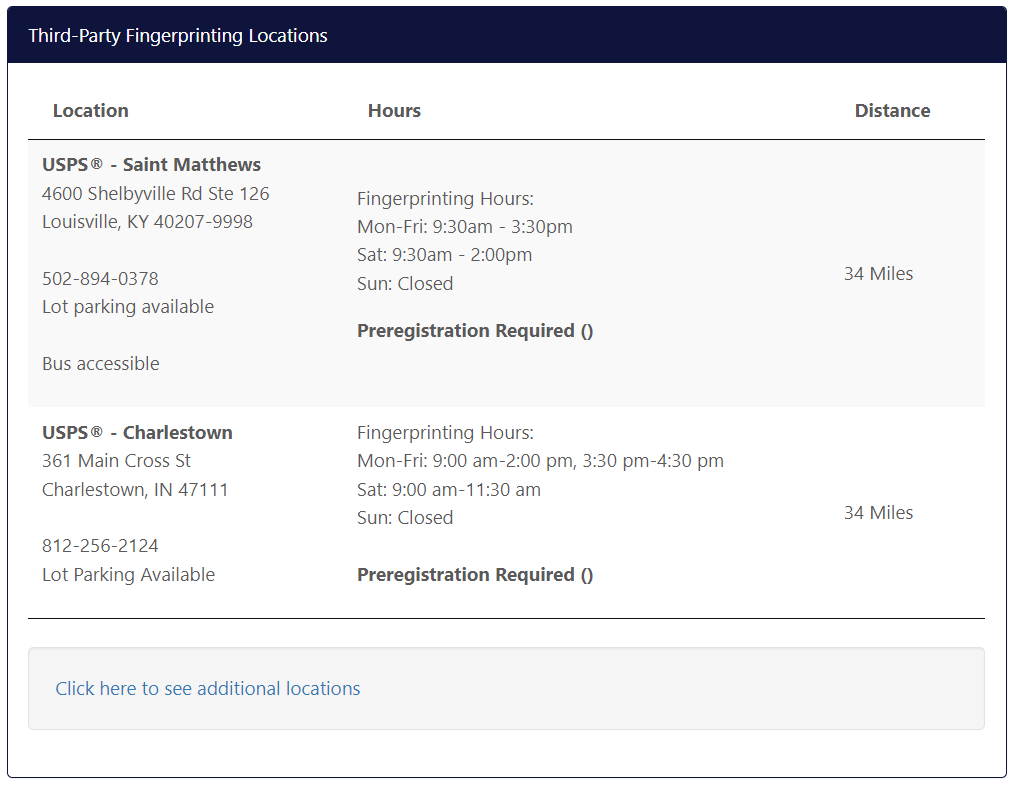
In my situation, I would check all the options in the List of Participating U.S. Post Office Locations without providing my zip code.

If you choose to use one of the location options offered by the FBI, keep the electronic submission option checked and continue to step 5.
Step 5 – Payment: Confirm your information and continue with payment. The cost will be $18. Complete your payment details. Don’t forget! You will pay an additional $50 as a fingerprinting fee at a participating USPS location. Check for an email confirmation, and save the order number. This will be used to register for the fingerprinting services.
Finally – register and have your fingerprints taken: Using your order number, register for fingerprinting service through the USPS.
Check the fingerprinting hours of your USPS location, and show up during that time with a printed copy of your FBI payment confirmation email.
You should receive your FBI background check within a day or two. You can check the status by using the FBI link from the original email along with the PIN provided to you. When the results are ready, you should receive an email from the FBI. The FBI background check will either be attached in the email, or you could download it at the status page. Start the Apostille of the Hague process as soon as you have a downloaded copy of the FBI background check.
Step 2 Getting the Apostille
≈Day 1 As soon as you get the email with your FBI background check results, you can apply for Apostille of the Hague. You do not have to wait for the hard-copy through the mail. Print a high quality copy of the document, and make sure that your printed copy has the large FBI seal in the background.
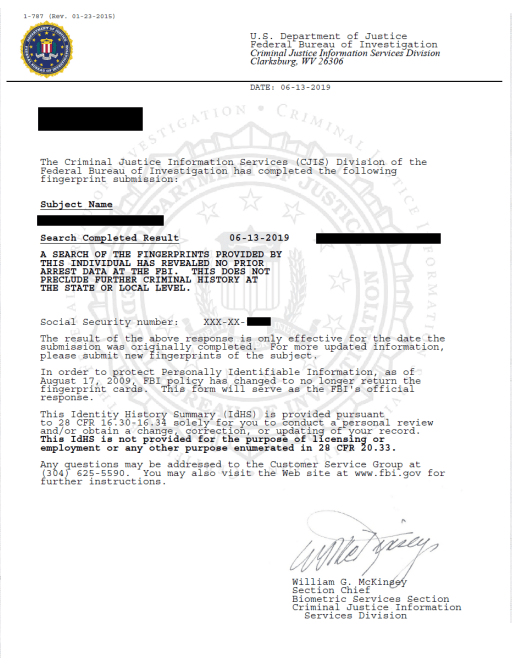
Because the Federal Bureau of Investigation background check is a federal document, you need to have a federal apostille. Federal documents get federal Apostilles, and state documents get state Apostilles. Although your state department may offer Apostille services, it is not valid for the FBI background check.
If you want to speed up the Apostille process or avoid doing it yourself, you can use a paid service. Monument Visa Services isn’t a sponsor (so please consider supporting the work I do), but I arranged a discount for my viewers: $100 instead of $125 with my link. They do great work. I’ve seen 2 week turnaround times from their services. If you want to save money and do it yourself, instructions can be found below.
Requirements: (link)
- “One self-addressed, prepaid envelope for return of your document.” Use USPS. Here it is online (link). Do not purchase it online, though. For the apostille, you will need 2 USPS Pre-paid mail envelopes with a tracking a number. Go directly to a USPS post office, and purchase the 2 necessary envelopes:
1 USPS Prepaid mail envelope with a tracking number to send the FBI background check to be apostilled.
Office of Authentications
U.S. Department of State
CA/PPT/S/TO/AUT
44132 Mercure Circle
P.O. Box 1206
Sterling, VA 20166-1206
1 USPS Prepaid mail envelope with a tracking number included in the FBI background check/apostille letter with a return address, so the apostille can be sent back to you.
Return name
Home address
Your Address
Still your address
Make sure that the envelope that is addressed to you is accurate! - The FBI background check document. Remember, make sure the FBI seal is visible in the background.
- A $20 check or money order addressed to the U.S. Department of State. This is a per document fee for the apostille, not per page. You may see on the DS-4194 form and online that the fee is only $8, but that is outdated.
“If you are mailing your request, pay by check or money order. Make them payable to the U.S. Department of State. Do not send cash or credit card information.
Include the customer’s name and address on checks (make sure this information is preprinted) and money orders. All check numbers must be over 100.” - A completed Request of Authentications Service DS-4194 form.
Section 1 fill out your personal information.
Section 2 fill out your delivery method and tracking number (found on the self-addressed, prepaid envelope)
Section 3 leave blank – you do not have a courier or representative.
Section 4 Country of Use: Spain, Document Type: FBI Criminal Background Record, Number of Documents: 1, Processing Fee per Document: $20.
Complete Section 5 where you estimate the total cost ($20), and then finally, place your FBI background check, DS-4194 Form, $20 Check, and self-addressed prepaid priority USPS envelope (you can fold it so it fits) in your prepaid priority USPS envelope addressed to the office of authentications.
To make an inquiry about the status of your Apostille, you can call the Office of Authentications at 202-485-8000 on Monday through Friday from 8:00 a.m. to 3:00 p.m. Before calling, read the instructions on the “Check your Document Status” tab on the right hand side of their webpage (link here).
If you need to rush the apostille process in case of a travel emergency, you can contact your member of congress. Members of congress are authorized to give applications priority in the case of a backlog. Most representatives have a website with information about making a request (either an official request form or specific instructions.) If there is no information available, you can simply contact them with your request. Include all the necessary information for them to identify your apostille order and when you need it. Not every member of congress will help you, but some will, and it doesn’t hurt to ask.
(Make sure to wait about a week after sending your application so that it has been received before contacting your member of congress.)
https://www.house.gov/representatives/find-your-representative
Here is an example of what you might find:

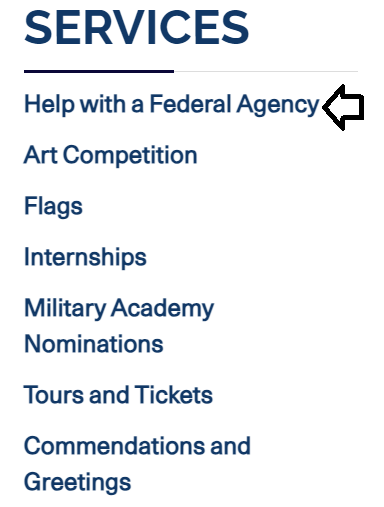

After clicking on “Services” and “Help with a Federal Agency”, I am directed to a webpage with specific instructions on how to enter my information to receive help.
*Your FBI background check is already certified by the FBI, and the apostille is a form of notarization, so getting the original documents notarized is not necessary.

Step 3 Getting the Translation
≈Month 2-3 (and after getting “aceptada” status if you are concerned about not being accepted into the program) Send the FBI background check to be translated. You can do this by simply sending a PDF of your background check to a sworn translator (again, make sure the FBI logo is visible in your scan). Again, make sure you DO NOT remove the affixed Apostille. You can fold the corner of the document to make a scan if needed.
What makes a sworn translator “official”?
A sworn translator is a translator who has been licensed by the Ministry of Foreign Affairs. Not all translators are sworn translators. A sworn translation is required for legal purposes such as getting a visa. Here is an example of a sworn translation below:
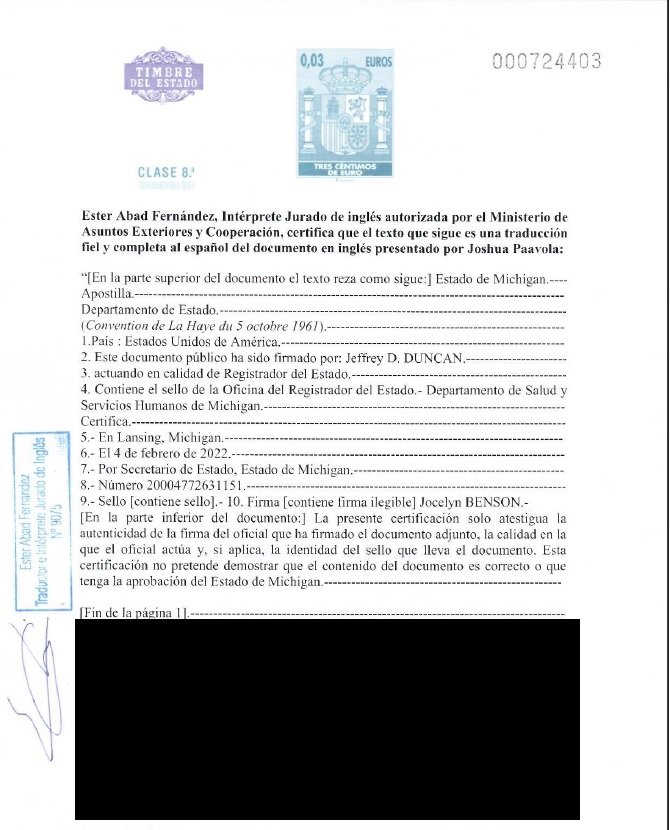
How to get the sworn translation: Get into contact with a sworn translator. Give the relevant information such as the type of documents being translated, preferred payment method*, translation delivery method (attached in an email), and the expected turn-around-time.
*You’ll have to make a money transfer to pay for the translation. Some translators have domestic accounts, but regardless, you will need a designated transfer service eventually when moving to Spain. Be mindful of the fees and exchange rates.
Although many familiar services like PayPal can make domestic and international transfers, your goal is to pay the least amount of dollars possible, not more. Those services tend to have terrible exchange rates, which work like massive hidden fees on each transaction. That’s why I highly recommend Wise. It is what most auxiliaries use because it has lower fees, higher transparency on costs, and reliable, fast transfers. Feel free to investigate for yourself. You can find a guide below.
Wise
(Wise can help you make domestic and international bank transfers for cheap.)

For the 99% of you who are getting English to Spanish translations, I highly recommend working with Alba:
alba.fernandez.c.residency2sp@gmail.com
She is a sworn translator who has experience working with auxiliaries and helping individuals get through difficult bureaucratic processes in Spain which means she will be highly responsive and helpful while also providing budget-friendly pricing. When I got my translations done through Alba, I used Wise to make a domestic bank transfer directly to her American account.
What if I need a translation from a non-English language to Spanish?
You can search for sworn translators that work for other language pairs in the webpage below. It’s the same process, but you may have more difficulties finding responsive translators. Not everyone is actively looking for work.
Bring the original and a copy of the Apostilled FBI background check and translation to your appointment.
During the wait times throughout this process, you can complete the other requirements. The other parts are much easier, I promise! These requirements are single step parts and not too involved.

Have you considered supporting this resource? It only costs a few dollars to help immensely. I hope these free guides have helped you better navigate Spanish bureaucracy. By contributing pocket change, you can allow this resource to continue to exist.
Visa Application Form
Form link (here) – Bring the original and a copy
Each office has its own link, but the form is the same for all of them.
BLS auto generates an application form when creating an appointment profile, but I insist you fill out your own form to avoid any issues.
“Fill correctly your date of birth (and other dates): DAY/MONTH/YEAR (Spanish way) and do not forget to write your email address and to sign the form.“
Foto/Photo – Attach your recent, professionally done visa photo onto the space provided in the Visa Application Form. “Do not staple or use anything other than glue to attach the photo to the form.”
Sections 1-9 – Fill in your personal information. All questions are given in Spanish and in English
Section 10 – If you’re not a minor, write N/A
Section 11 – N/A (You do not have a Spanish National ID Number)
Section 12 – Type of travel document – Ordinary Passport
Section 13 – Passport number
Section 14 – Date issued
Section 15 – Expiration date (make sure it is valid for the entirety of your stay in Spain.)
Section 16 – “US Department of State”
Section 17-19 – Fill in your personal information.
Section 20 – “Studies”
Section 21 – When you intend to arrive in Spain. You can put an earlier date than when the program begins, giving you time to get situated in Spain.**
** They will likely request that you are insured for that extra time.
Section 22 – “Multi” or “more than 2”
Section 23 – Address in Spain (it can be an AirBNB, dorm, apartment, or whatever) You can always book a short term rental and then cancel.
Section 24 – If you lived in Spain previously and have a NIE, put it in. If not, leave it N/A. (At your visa appointment, they may want to see the passport that contains the old Spanish visa.)
Section 25 – If you lived in Spain previously and have a NIE, write the date of issuance. If not, leave it N/A.
Section 26-27 – N/A
Section 28 – Information from your acceptance letter
Section 29 – N/A
DONT FORGET TO COMPLETE SECTION 30 AND 31 – Section 30 – Place (town/city where you signed the document) and Date Section 31 – Signature.
Photograph
The consulate requests a recently taken 2″x2″ passport photo.
BLS requests the following: “A recent colour photograph (US passport size)”. This corresponds with the consulate, but under “photo specifications” in most BLS webpages, you can find this image:
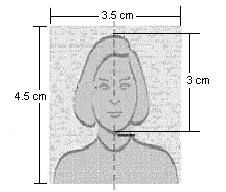
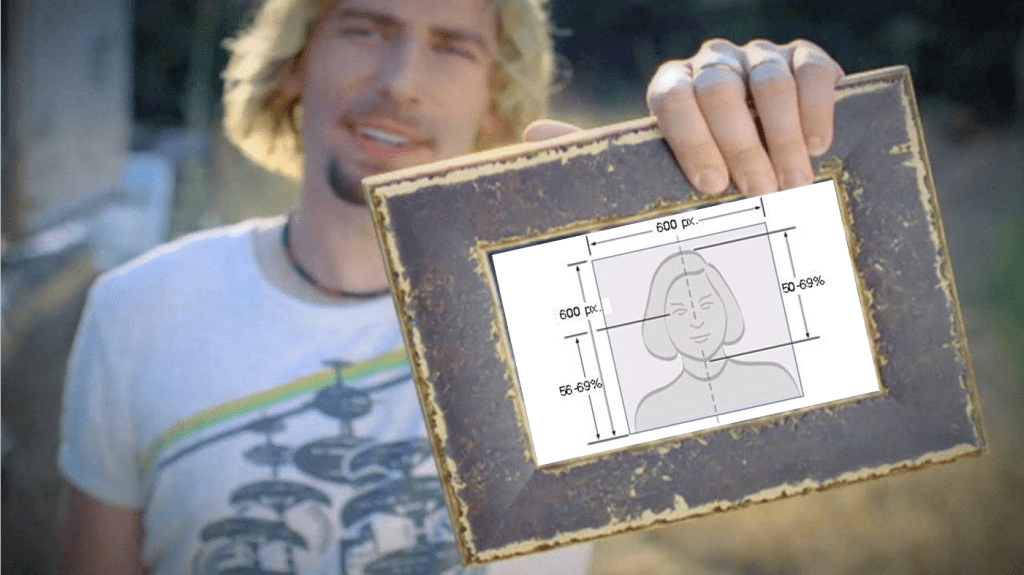
The photo dimensions are incorrect. Make sure to get US passport style photographs 2″x2″.
I recommend getting extra copies in case the original is damaged.
Many retailers offer official passport photos. I recommend CVS. Additionally, a photo booth meeting these requirements is also available at the BLS centre.
Valid, Unexpired Passport
Valid and current passport with at least 2 blank pages in the visa section and valid for at least the entire duration of the intended stay. Passports issued more than 10 years ago are not accepted.”
You must also include a copy of the page where your data and photos appear. (New York requires a notarized copy of those pages)
If your passport is set to expire within the next year and/or does not have enough blank pages for a visa, renew it.
“Passports issued more than 10 years ago are not accepted and they must be valid for a minimum of one year and also valid at least until 3 months after the end of the stay in Spain.” – Consulate of Spain in Boston
Getting a Passport (U.S.)
Renewing Your Passport (U.S.)
If you are a non US passport holder, you need to provide a notarized copy of your immigration status in the US: permanent resident card, valid US student visa along with Form I-20, Work Permit, passport stamp or parole.
Acceptance into the program
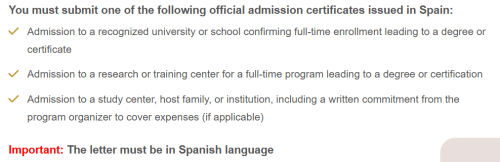
“Certificate of admission issued in Spain by any authorized university or school, verifying enrollment as a full-time student, leading to obtaining a degree or certificate. The certificate must detail: name of the program, duration (start and end dates), address, phone number, name of the person in charge of the program (the certificate of admission must be presented in Spanish) and extra information about the payment of the study program registration and his/her signature (handwritten or electronically).
It must be translated into Spanish if the original is in English. Please take into account that we will consider the dates stated in the letter of the Spanish center in order to issue the visa (please check requirement #8) . Do not submit a letter of your U.S university with different dates as they will not be considered.”
Your acceptance letter will be provided to you by your university/program. If it isn’t, request it. Bring the original and a copy to your appointment.
Proof of Payment – Tuition for the program
Since the new immigration regulation (Royal Decree 1155/2024) went into effect in 2025, you are now required to pay tuition and provide proof of payment at your visa application. This should also be handled by your university/program. You will make the payment and request/be provided proof of payment. Partial payment of enrollment or tuition fees is sufficient. Bring the original and a copy to your visa appointment. If the program is tuition free, bring proof of that.
Proof of Financial Means

Not quite. They want reassurance that you won’t be living in the streets of Spain. Here are the different means of providing proof of financial means:
- Your program takes full financial responsibility (in a written statement – usually in the admission letter). That means they will provide food, shelter, and other necessities.
- Proof of financial aid/scholarship/stipend from the program.
- Notarized letter from the bank of mom and dad (or legal guardian) taking full financial responsibility of your well-being.
- Money in the bank (bank statements)
“Original and copy, to cover the expenses of stay and return to your country, and, where appropriate, those of your relatives. For the applicant’s support, a minimum amount of $700 per month unless it is duly accredited to have the accommodation paid in advance for the entire duration of the stay.
For the support of family members during their stay in Spain: a minimum amount of $520 for the first family member and $450 per month for each of the remaining family members who will integrate the family unit in Spain.” – Boston (check your own consulate for the exact numbers)
This amount is in addition to the amount used or to be used to cover cost of studies.
How is the amount needed decided?
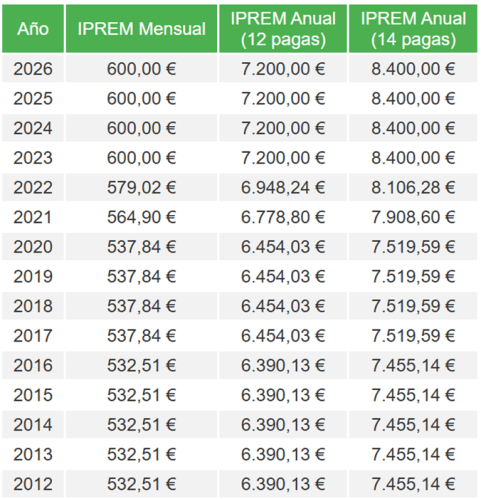
The IPREM hasn’t been updated to reflect inflation since 2023. Don’t expect to survive on 600 euros a month.
Each year, Spain updates an index called the “IPREM”. It is basically the calculation of how much is needed to survive (not live well) in Spain. If you make below that amount, you qualify for public assistance/benefits because it is assumed that you don’t make enough to support yourself.
That’s why you must show a minimum of $700 per month in Spain.
600 euros a month (the current IPREM as of 2026) is equivalent to about $691. Round up, and we get $700 a month.
Methods 1/2: Carta de Nombramiento (admission letter)
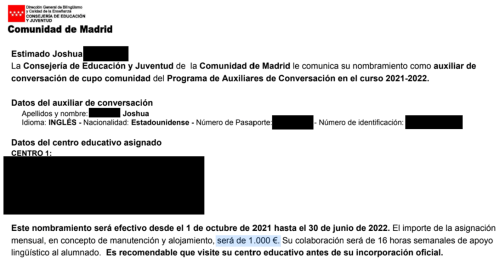
Provide your admission letter (original and photocopy) that either provides a stipend that exceeds the IPREM or assumes full financial responsibility of you.
Method 3: Notarized letter from parents/legal guardian
Official printouts stamped and signed by your bank (or downloaded directly with official electronic verification).
Notarized letter (and photocopy) from the parents or legal guardians assuming full financial responsibility for at least $700 per month for room and board. Suggested wording: “I hereby certify that I’m the (father/mother/other) of (…), will support him/her with a monthly allowance of at least $700 while he/she is in Spain and that I’m financially responsible for any emergency that may arise”, along with their bank statements and applicant’s Birth certificate.
Method 4: Personal bank statements
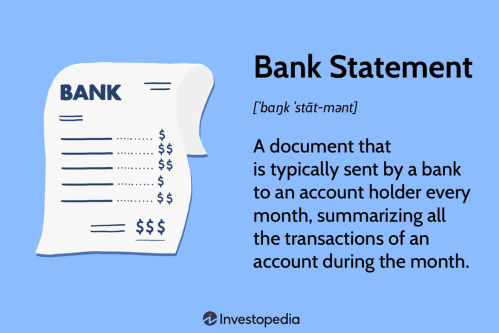
Official printouts stamped and signed by your bank (or downloaded directly with official electronic verification).
Personal bank account statements showing at least $700 per month of stay. Show the last 3 months of bank statements (+photocopies).
Proof of Accommodation
Not an official requirement; may be requested regardless

Just like with the proof of financial means, Spain doesn’t want you to end up living in the streets. Although not officially a requirement, you should have some proof of accommodation in Spain. Additionally, having a Spanish address helps immensely with a lot of the forms and other requirements.
Otherwise, you may have to use your school’s address.
Temporary Accommodation – Not Permanent
Do not buy/sign/reserve any type of apartment before seeing it first in person. Housing scams exist. Do not make yourself an easy target. Instead, focus on booking temporary accommodation such as an AirBnB, hostel, or hotel. Print 2 copies of your proof of reservation for your appointment just in case. If you need to, you can always cancel afterwards.
Bring your proof of accommodation plus a photocopy to your visa appointment.
Proof of Insurance

“Health insurance from an insurer recognized and authorized to operate in Spain. ORIGINAL AND COPY. The insurance must cover all risks normally covered for nationals and must be valid FOR THE WHOLE STAY IN SPAIN including the 30+15 extra days. If the total of days is over 180, the health insurance will cover 365 days.
It must cover at least all the preventive, diagnostic, treatment and rehabilitation assistance activities that are carried out in health centers or socio-health centers, as well as urgent health transport. The health insurance must not have a deficiency, copayment, or coverage limit, that is, it must cover 100% of the medical, hospital, and out-of-hospital expenses.
It must be health insurance. Travel insurances and insurance cards are not accepted.”
Previously, you only had to be covered during the full extent of your studies. Since May of 2025, you are now expected to cover a full month prior to the start of your studies and up to 15 days after it ends.
The idea is for Spain to provide an extended student visa. This would allow students to move to Spain before the start of their studies and leave after the last dates.
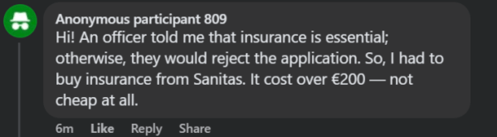
If you are looking for health insurance for the entirety of your stay in Spain (plus the additional coverage), please shop around. Look for visa compliant health insurance policies in Spain. (don’t just look for the cheapest policy – you might need to actually use your insurance in Spain).
If you are provided health insurance by your program, make sure it covers the additional requirement of 1 month before the start of the program until 15 days after the program ends. If it doesn’t, look for a flexible health insurance (make sure you can cancel after getting covered by the program) to supplement, or communicate with your program to extend their coverage.
Medical Certificate
The Medical Form is only valid for 90 days, so plan accordingly
Medical form template Original and a copy of a “recent medical certificate, issued in the last three months before the application date, on the letterhead of the doctor or medical center, duly signed, sealed and translated into Spanish by a sworn translator, stating: ‘This medical certificate certifies that Mr./Ms. (…) does not suffer from any disease that could have serious implications for public health in accordance with the provisions of the 2005 International Health Regulations’. In the case of using the model from our website, the Spanish translation is not necessary.”
Book a check-up with your doctor (not nurse, nurse practitioner, or anything other than an MD), and have the template filled out. Please, make sure that all the requirements of the form are completed. If your doctor does not fill out the Spanish section, you need to have the form translated by a certified translator. Follow the instructions carefully.

Instructions on page 2:
Written on letterhead paper from hospital´s/doctor’s office:
See a doctor (MD) and they will determine if you are of good health according to the International Health Regulation (2005). This PDF file can be sent electronically in order to be printed out on letterhead paper. The doctor may also use this sample as a guide to write his or her own certificate. Remember that it must specifically mention the International Health Regulations (2005). The doctor should then print out, sign, date and stamp the Medical Certificate.
Written on Template:
This template can also be signed and filled out by the doctor, with doctor’s stamp; without the stamp, the template is not valid. Therefore, if your doctor does not have a stamp, in order to be accepted, the doctor must write the information from the template to a letter with a letterhead of the hospital or doctor’s office, so it can be accepted at the Consulate.
Proof of Residence in the Consular District
Each consulate only services certain states/regions of states, so show proof that you live in one of those states/regions.
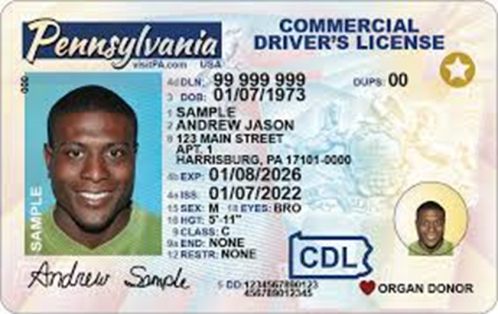
Proof of residence in the consular demarcation. Provide a copy (not the original) of the US driver’s license, duly notarized.*
*Boston is an exception
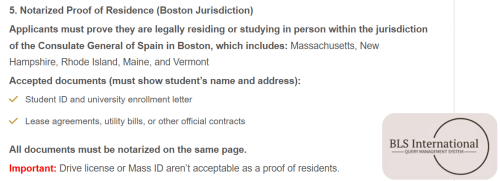
This is why it is important to double-check with the official sources.
Getting a notarized copy (link)
Making a Notarized Copy
“Proof of residence in the consular demarcation. Provide a copy (not the original) of the US driver’s license, duly notarized.“
What is a notarized copy, and how do I get one?
A notarized copy is a copy of your document that is stamped and signed by a notary to authenticate that it is a true, unaltered copy of the original document.
YOU DO NOT NOTARIZE YOUR ORIGINAL DOCUMENTS!
Not every state allows copy certification by a notary. The map below indicates which states allow copy certifications.

*California only allows copy certification for very specific purposes such as power of attorney. Californians will have to make a certified statement (option 2 below)
Depending on your state, you may complete option 1 or 2 to get a notarized copy.
Bring the following to your notary: the original document(s), an unaltered photocopy of the original document(s) (the notary may prefer that the copy is made in their presence. Please ask.), and a valid ID.
How to find a notary: your local bank is your best bet. Call ahead of time to make sure the notary will be available when you visit, and schedule an appointment.
Option 1 (state allows copy certification): State that you need a notarized copy for your visa, and request a copy certification of your unaltered copy. The notary will write ‘TRUE COPY’ and put their signature, seal and stamp on the copy itself.
Option 2 (state does not allow copy certification): State that you need a notarized copy for your visa, and bring the following statement to be completed.

You need a notarized copy of the following:
- Your proof of residence in the consular district
- (New York only) Passport pages containing biometric data.
Payment of the Visa Fee
Generally, you will pay the fees with cash, debit, or a money order. It entirely depends on your consulate (check their webpages!)
I recommend you come prepared for various options.
The American citizen fee is $160. You can check their website for the most recent visa fees (here)
You are applying for the long term student visa EE.UU (USA).
Additionally, BLS charges a $20 processing fee.
Amount: $180

Disclaimer Form
Print and sign the disclaimer form provided by BLS
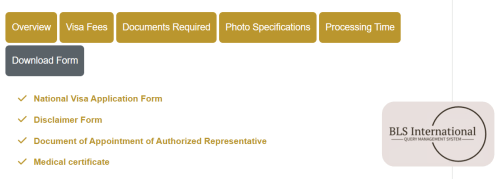
New York’s disclaimer form gives a 404 error, so I created a template you can use.
Visa Application Appointment
As of May, 2025, by law, you are required to apply for a student visa at least 2 months prior to the start of your studies/program.
It is incredibly difficult to get a visa appointment, so start checking early. Aim for a window between 2.5-3.5 months before the start of your studies/program.
To Make an Appointment
(General Overview)
- Create a profile on BLS’s website. Select your location and visa application type.
- Fill out an online application form. The information you provide will automatically fill out a National Visa Application form. However, I recommend you manually fill out your own National Visa Application form instead.
- Upload a profile picture.
- Search for and select an available appointment within a suitable timeframe. (Appointments are generally released in batches).
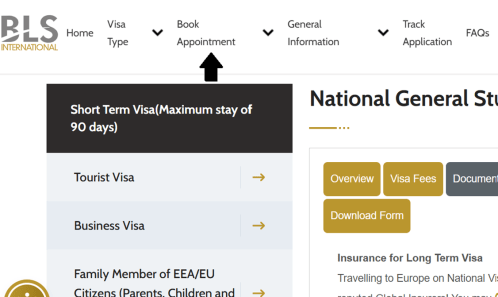
Before you start: Triple check both the consulate page and BLS page for changes.
Small things such as being able to apply via mail or in person, the office address, and being able to have your visa sent back to you can change, so please check for yourself. If given the chance to apply via mail or in person, as long as it’s not too inconvenient, I recommend in person applications. That way, you can correct any small mistakes in your application while you are there.
Go to the following BLS page.
https://usa.blsspainglobal.com/Global/account/login
Create an account. Agree to the terms and conditions and input your personal details. For “Passport Issue Place” put the authority information located on the data page of your passport.
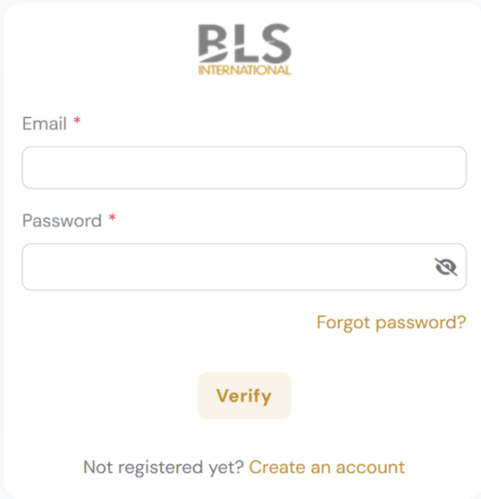
After registering your account, log in, and select “book new appointment”.
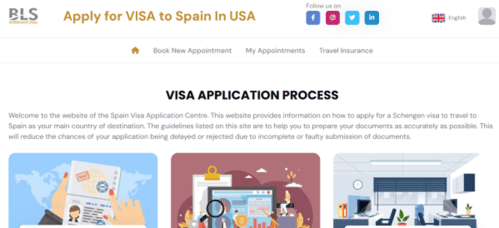
Make sure you select the correct location when booking the appointment! It should be YOUR consulate.
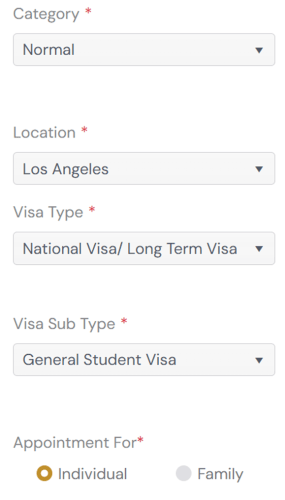
In the following page, you’ll be asked to complete an application form.
1. Input your personal details.
2. Add your passport details.
3. Address and contact details.
4. If you are a resident in another country, check yes. If not, leave it blank. Main purpose – “Study”
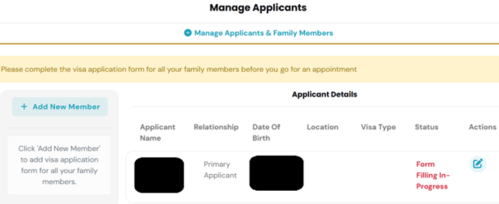
Intended date of arrival – When you intend to arrive in Spain.
Number of entries requested – multiple
Intended stay duration – Do the math. How long is the program (in days)?
Applicant’s address in Spain – (The address is just a placeholder for now. Your official application form can carry a different address later on).
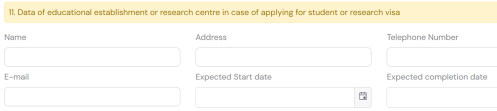
After filling out your info, they will provide you a PDF of the National Visa Application form with your answers filled out. Do yourself a favor and throw it away.
It is much better to manually input your info on the visa application form (detailed higher up in this page).

Don’t be picky about your appointment date! It can often be very difficult to find an available appointment.
It’s a good idea to start searching for available dates BEFORE you finish all your paperwork.

At the Appointment:

Take your appointment reservation. Bring everything in the check list/all the necessary documents to this appointment.
It’s also a good idea to wear something business casual. It’s not a job interview, but your first impression can be impactful, especially if you made a small mistake.
At your visa appointment, officials will check and collect all the necessary documents. They will keep your passport while the visa is being processed. This could take between a few weeks and a little over a month. This has 2 major consequences:
1. You won’t be able to fly internationally while your visa is being processed.
2. You will need to have or apply for a Real ID before your visa appointment in order to fly domestically. The Real ID requirement for domestic flights began on May 7, 2025.
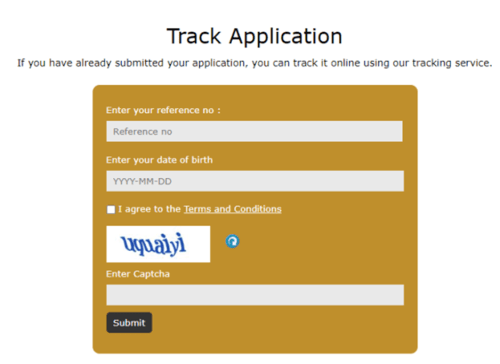
At your appointment, make sure to ask about the visa collection procedure. For most BLS offices, it’s quite similar:
- Check your status online through https://usa.blsspainglobal.com/Global/bls/VisaApplicationStatus using the receipt provided during your visa application.
- Once it states Visa: Resuelto. That’s your queue to go to the BLS office to pick it up (within the pickup window – check the BLS page for this information)
- Some BLS offices allow for a courier service to deliver your passport + visa.
Your visa should be affixed to your passport like a sticker.
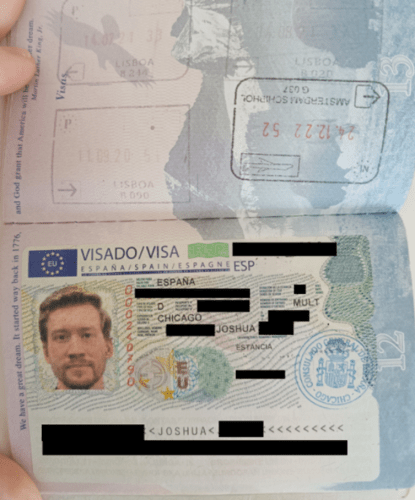
Depending on your consulate, it may or may not include a NIE (identity number for foreigners).
If it does, great! If not, please see the guide below:
https://residency2spain.com/my-visa-doesnt-have-a-nie/
Within 30 days of your arrival in Spain, you are expected to start the process of applying for a foreign ID card (TIE). If your study program is 180 days or less, then that wouldn’t be necessary.
https://residency2spain.com/your-first-tie/
Congratulations on getting your student visa! Buy your flights and pack your bags for your next adventure in Spain. I also highly recommend you look at what is to come. My guides on Residency2spain.com will help you open a bank account, transfer money abroad, apply for a foreign ID card, and much more.
If you found the website useful, please Support the Page. Every little bit helps.
Back to Navigation
The information on http://www.residency2spain.com is provided in good faith and is intended for general informational purposes only. Residency2spain makes no guarantees regarding the accuracy, reliability, or completeness of the content. Any decisions you make based on the information found on this site are made at your own discretion and risk. Residency2spain is not liable for any loss or damage resulting from the use of this website.
Copyright © 2022 Residency2Spain All rights reserved.

